How to Manage Mix Projects Efficiently and Keep Clients Happy
Table of Contents
If you’re a new music producer or audio engineer, mixing a track is only part of the challenge — managing the mix process efficiently is just as important. Between tracking feedback, managing multiple revisions, exchanging files, and keeping clients informed, it’s easy for projects to become chaotic. In this guide, we’ll walk you through a step-by-step workflow using tools like Opusonix to stay organized, streamline communication, and deliver professional results — all while enhancing the client experience.
1. Build a Centralized Workspace for Each Track Project
Before you dive into mixing, the first step to an efficient workflow is creating a centralized workspace for each track project. This is where every part of your project — mixes, notes, files, and feedback — lives and evolves over time.
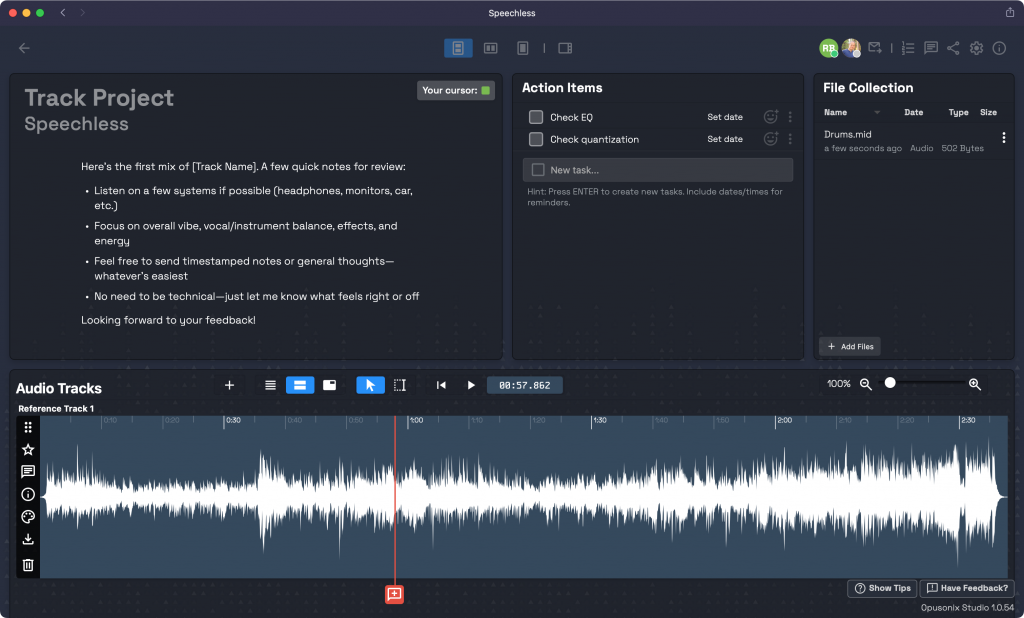
Start by using the Notes pod to manage all high-level thoughts about the track. This is a great place to jot down mix goals, arrangement notes, or production ideas. Encourage your client or collaborators to use the same Notes pod for their feedback and creative direction. Each note automatically shows the author’s name, so even as the conversation grows, it remains clear who said what — almost like a chat thread dedicated to your project’s big-picture ideas.

Next, make use of the Tasks section to track key dates, milestones, and deliverables. You can add tasks like “Deliver first mix,” “Client feedback due,” or “Prepare final master,” and check them off as you go. Not only does this keep you on schedule, but it also gives your clients a transparent view of your progress — reducing the need for them to constantly check in.
For your actual mixes, upload them into the Audio Tracks section. This is where you can easily manage mix versions, run A/B tests, and collect timestamped feedback right on the waveform. It’s especially useful when comparing multiple revisions or reference tracks — helping you and your client make faster, more confident mix decisions.
Finally, use the Files pod for everything else — zipped session folders, stems, project files, or even supporting materials like contracts, cue sheets, or scores. It’s your all-purpose shared storage area for any assets tied to the project.
If the user provided a rough mix in the Files pod, you can easily drag it into the Audio Tracks section to load it up for inspection.
Once these are in place, you’ve created a complete, living workspace for your track project. Everything is organized, accessible, and up to date — and everyone works from the same page. One of the biggest advantages? There’s only one link involved. No more juggling file-sharing links or outdated folders. The workspace itself becomes your single source of truth — the foundation of a smooth, professional mix workflow.
2. Exchange Files in your Track Workspace
Managing file exchanges can be a time sink for both you and your clients. Instead of jumping between Google Drive, Dropbox, or WeTransfer, just use the Files pod to exchange all files. You can click on the “Add Files” button to hand pick file(s) to upload, or just drag and drop the files into the Files pod. Remember that in Opusonix, the single file limit is 5GB, and that the file upload process may take a while to complete. Pay attention to the data saving progress bar at the lower right corner of the window.
This means one less third-party service to worry about, fewer broken links, and a more polished, professional workflow. Clients notice when things are streamlined — it gives them confidence that their project is handled efficiently and securely.
3. Collect Precise Feedback and Make Better Mix Decisions
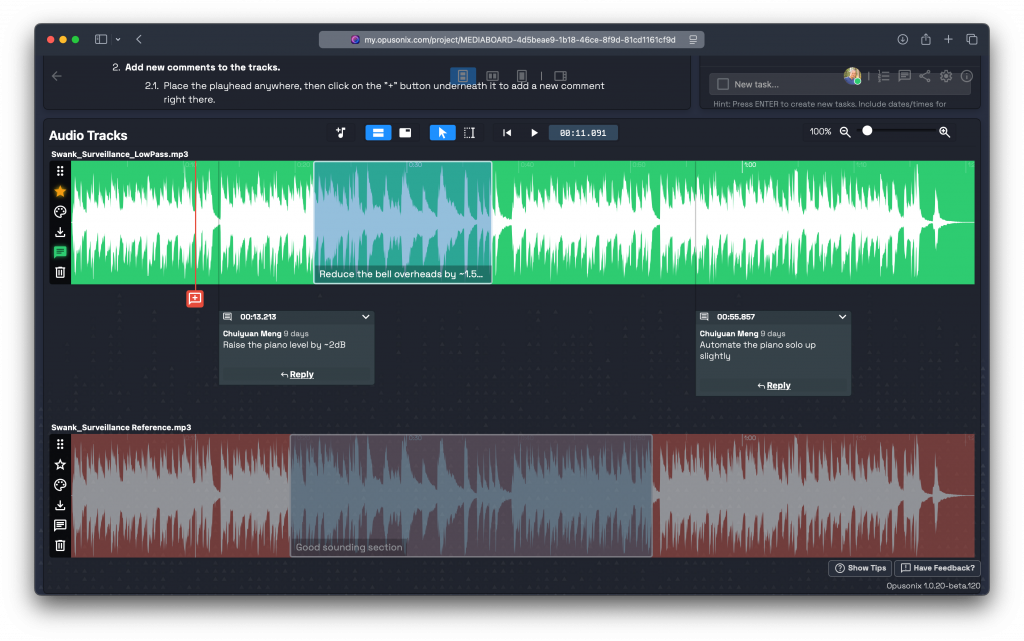
One of the most important aspects of working with clients and collaborators is making feedback clear and actionable. In Opusonix, you can provide highly precise feedback directly on the track itself, which saves hours of email back-and-forth.
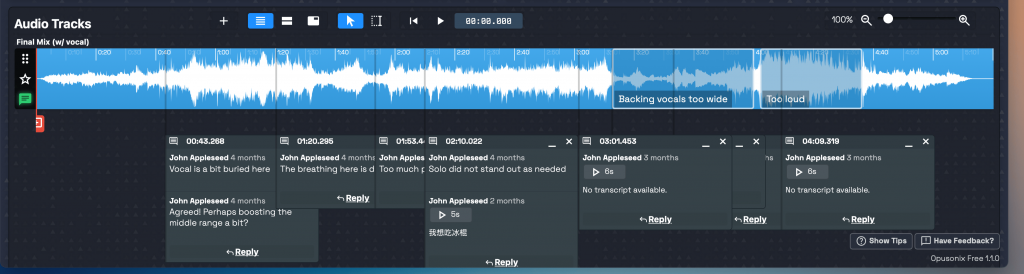
Start by placing the playhead anywhere on the track and clicking the “Comment” button. You can leave either a text comment or a voice comment — all voice comments are automatically transcribed, making it easy to read, reference, and reply later.
For faster feedback during initial listen-throughs, use the “M” keyboard shortcut. A quick tap of the M key drops a marker at the current spot, while pressing and holding M creates a region as the music plays. This is extremely handy for marking areas that need attention or noting ideas in real time.

All comments in Opusonix can be reacted to with five simple emoji options or replied to directly. This turns feedback into a precise conversation rather than a long, disorganized email chain. It keeps the discussion focused, reduces miscommunication, and helps both you and your client make better, faster decisions.
Another powerful tool for better decision-making is A/B testing. By comparing mix revisions side by side or against reference tracks directly in the Audio Tracks section, everyone can hear subtle differences clearly. This helps identify the strongest mix quickly and often reduces the total number of revisions — saving you and your client valuable time while producing better results.
When feedback is precise, markers are used efficiently, and A/B testing is integrated into the process, the workflow becomes faster, more transparent, and more professional — which directly enhances the client’s experience while keeping your project moving smoothly.
4. Plan and Test Your Album Efficiently
When working on an album, it’s important to get a feel for the overall sequence of tracks and how they flow together. In Opusonix, the Album Planner feature lets you see the entire album in one view, making it easy to create new tracks, rearrange them, and drop in mixes with just a few clicks.
Here’s a recommended workflow for a new album:
Create a new album in Opusonix and set the album title. This automatically takes you into the Album Plannerview.
Add album art and set up some album-wide notes. Just like the Notes pod in track projects, this Notes area is collaborative — each paragraph shows the author, so it becomes a living, conversational document for storing overall album notes and requests.
Create tracks as placeholders with their track titles. Arrange the sequence via drag-and-drop to test different orders.
Drop in mixes for each track. Once the audio tracks are set, you can play back the entire album to hear how it flows. If you receive new mix revisions, simply drop them into the corresponding tracks — Opusonix automatically sets the new mix as the primary version while preserving the previous revisions.
The Album Planner is fully collaborative and supports both real-time and asynchronous work, making it easy to bring in clients or collaborators remotely. On the left side, the built-in Chat area is persistent, so you can document progress, engage in conversations, and refer back to messages at any time.
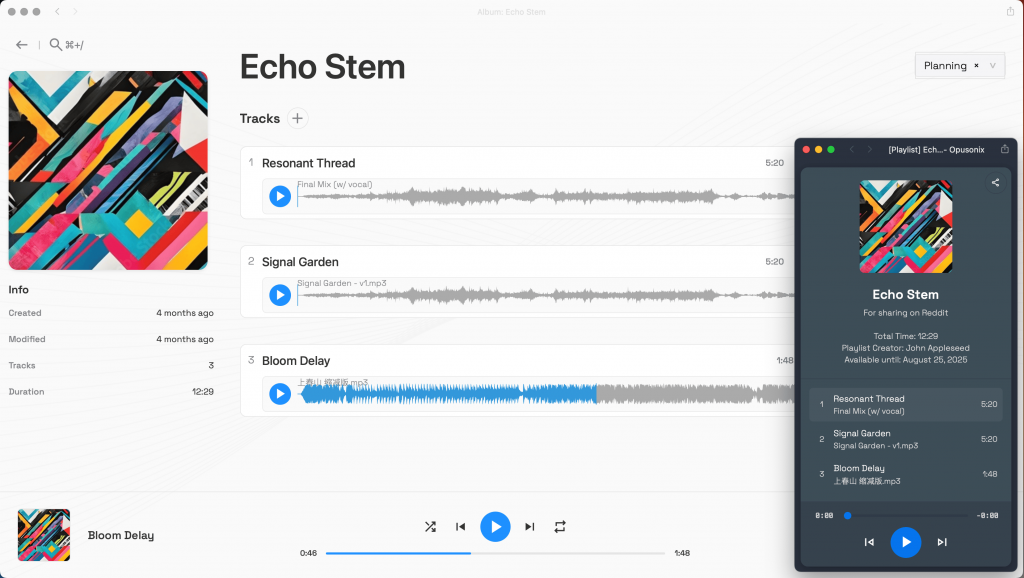
Want to share the album outside of Opusonix? Click the Share button near the top right to generate a web-based player link. Anyone with the link can listen to your album, and if you update the mixes on your tracks, the shared album player automatically reflects the latest versions.
This workflow makes album planning fast, collaborative, and highly professional, while giving clients immediate visibility into the album’s progression.
5. Track Progress and Keep Everyone Aligned
Keeping your projects on track is essential, both for your own workflow and for providing clients with confidence. Opusonix offers multiple ways to document progress and manage tasks efficiently.
Start with the Notes pod — it’s perfect for in-project discussions and progress tracking. You can do more than just write formatted text: add headings, bullet points, embedded web links, images, and checkboxes. To access these extra tools, hit the “/” key in a new paragraph and choose the option you need. Use checkboxes to mark off smaller subtasks or steps within a project note.

For deadlines and important actions, the Tasks pod is the ideal place to record and track them. Add tasks with due dates and check them off as they’re completed. This makes the project timeline transparent for both you and your client, reduces the need for periodic status-check emails, and builds confidence that the project is progressing smoothly.
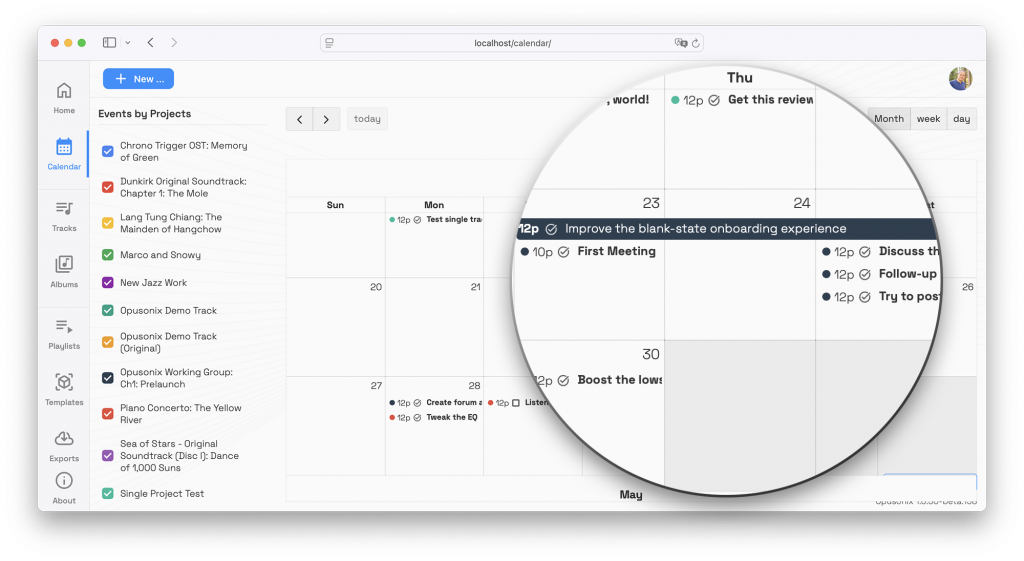
When tasks are tracked in the Tasks pod, your Opusonix dashboard shows progress bars for each project. You can quickly see where projects stand without opening them individually. Plus, all deadlines and pending tasks automatically appear in your Calendar view, giving you a comprehensive overview of upcoming actions across all your track projects.
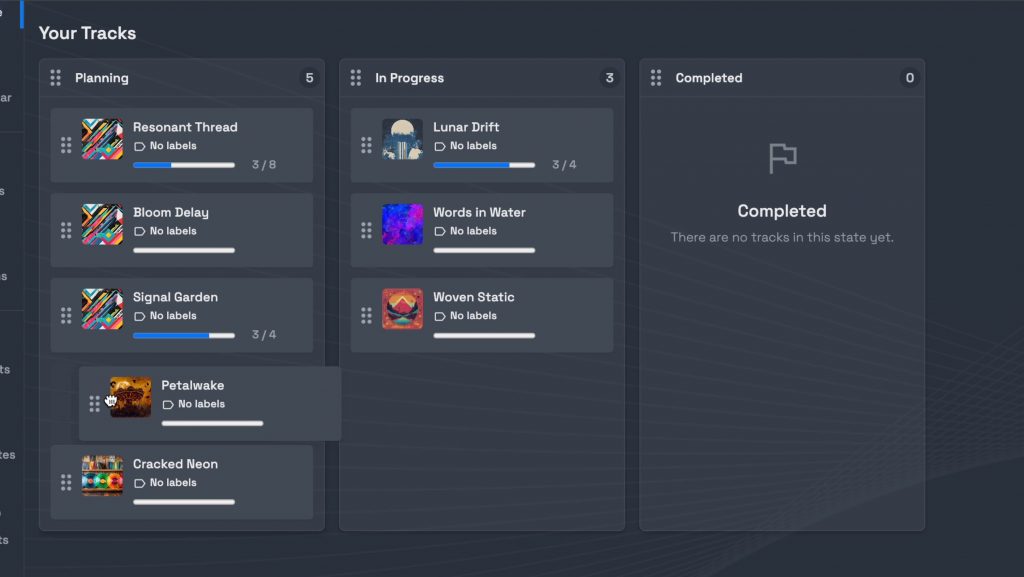
Finally, use the Track Project’s “State” property to reflect where a project is in your workflow — for example, “Brainstorm,” “In-Progress,” “Stalled,” “Payment-Pending,” or “Completed.” Customize states to match your process, and take advantage of the Kanban board on the dashboard to visualize all projects at a glance. This makes it easy to track progress, spot bottlenecks, and manage multiple projects efficiently.
By combining Notes, Tasks, States, and the Dashboard, you create a workflow that’s transparent, professional, and reassuring to clients — all while saving yourself time on status updates and check-ins.
6. Control Downloads and Deliver the Final Product
Managing how clients access your mixes is crucial for both professionalism and clarity. In Opusonix, you can use the download control feature to prevent invited clients or collaborators from downloading your mix files. When download control is enabled, they can listen to the mixes and provide comments, but they cannot download the audio files themselves. (Note: this restriction does not apply to files in the Files pod, which remain freely downloadable.).
You can also adjust the Download Control setting in the Settings panel at anytime.
Whenever you upload a new mix revision, make sure to set it as the Primary track by clicking the Star button next to the mix. This ensures everyone knows which version is the latest. More importantly, any previews — whether from the Opusonix dashboard, your Projects browser, the Album Planner, or shared playlists — will automatically use the correct Primary track, preventing confusion and mistakes.
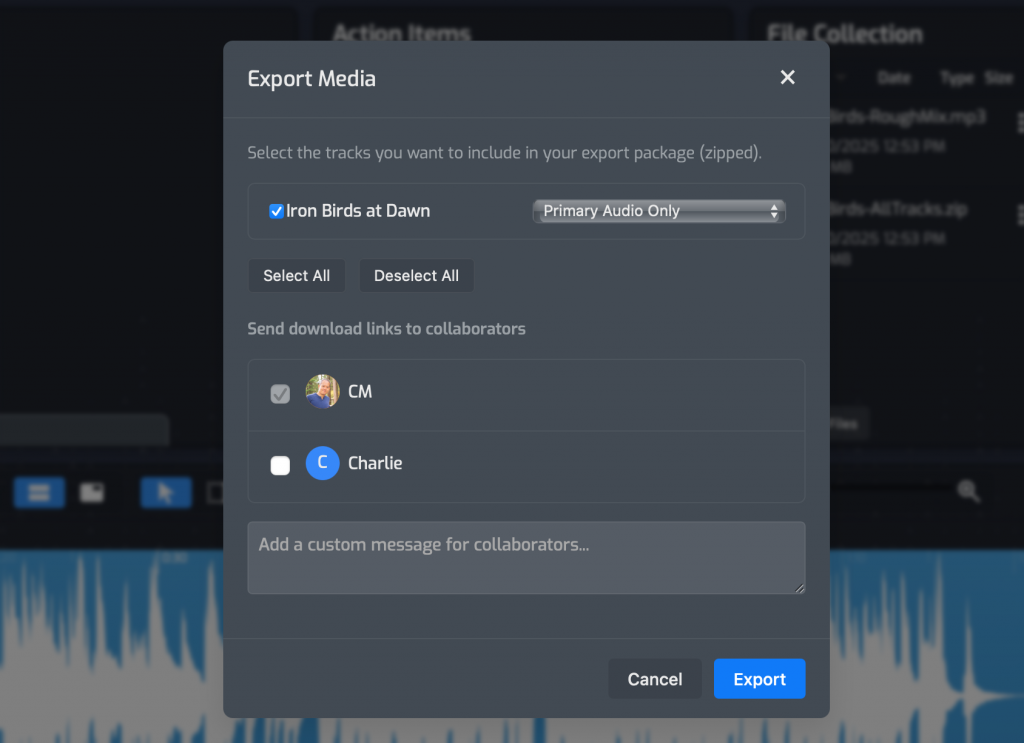
When it’s time to deliver the final product, the Export feature in the Share panel makes it simple. You can export one or multiple Primary Tracks in full resolution as a single zipped file, and you can select which recipients — including your clients — receive an email with the download link. You, as the engineer, always get a copy of the email. This eliminates the need to manually send files, track downloads, or manage housekeeping tasks at the end of the project.
Using download control, Primary tracks, and the Export feature ensures your delivery is professional, organized, and foolproof, giving both you and your client confidence that the right files are shared efficiently.
Final Thought
An optimal mix workflow isn’t just about keeping yourself organized — it directly impacts the client experience and the quality of your work. By creating centralized workspaces, tracking notes, tasks, and project states, managing mixes and revisions, planning albums efficiently, collecting precise feedback, and controlling downloads and final delivery, you can streamline every stage of your projects.
For engineers and producers, this means less time spent hunting for files, chasing feedback, or managing emails — freeing you to focus on creativity and making better mix decisions. For clients, it translates into clear communication, transparent progress tracking, and a professional, stress-free experience.
When your workflow is efficient, everyone benefits: decisions are faster, revisions are fewer, and your projects move smoothly from initial ideas to final delivery. An organized, collaborative, and transparent process not only saves time but also enhances trust, productivity, and ultimately, the quality of the music you produce.